You can only get a good night's sleep and get a boost of energy in complete darkness. Often, light comes in through the windows, disrupting your night's rest. A special blindfold, which can be purchased at the store, will help solve the problem. It’s not at all difficult to make a sleep mask with your own hands. To do this, you just need to know the manufacturing technology of this accessory. As a result, you will be able to get an original, high-quality product, thanks to which your night's rest will be complete.
Manufacturing recommendations
When sewing a mask you need 2-3 layers of material:
- front side . This layer is required. You can take any fabric you like. Silk, cotton, satin can be used. The material is taken in one color or decorated with various prints;
- lining. This layer is optional. Thanks to its presence, the accessory becomes softer and retains its desired shape. If desired, no filler is used. As a rule, padding polyester is placed inside the product. A good solution would also be fleece or non-woven fabric. However, it should be taken into account that the materials are warm, and when wearing a mask, the face may sweat, which is extremely undesirable;
- inner part. Also refers to mandatory parts. This tissue will be in direct contact with the skin. Therefore, special attention is paid to its choice. Preference is given to soft, natural materials (chintz, satin, flannel or cotton). The use of synthetic fabrics is strongly discouraged - they can lead to the development of an allergic reaction. There can be no talk of any comfortable sleep.
Figuring out how to sew a blindfold is easy. The main thing is to accurately determine the size. As a rule, the main part varies in width from 18-20 centimeters, and in height - from 7 to 10 centimeters. The slot for the nose is made approximately one third of the height.
The bandages should initially be cut out from paper, after which the resulting pattern should be applied to the face. In this way, it is possible to select the most suitable parameters.
The length of the elastic is a purely individual parameter. Here you should also do a fitting. This part of the accessory should fit snugly, but not cause discomfort.
Using one pattern it will be possible to make various masks. To do this you just need to show a little imagination. They are decorated with:
- applications;
- lace;
- rhinestones;
- sequins;
- embroidery
The list of materials that can be used as decoration is not limited to this. It is not worth adhering to a strictly defined technology for making a bandage. The product must be unique, inimitable.
When sewing, it is recommended to use more imagination and not be afraid to experiment. Thanks to this, it will be possible to create a real masterpiece.
Treatment of various types of wounds, use of dressings
Determining the presence of a wound in a person is quite simple - usually this lesion is accompanied by severe pain and bleeding. If blood vessels are affected, the victim will experience severe blood loss, and the blood may ooze profusely, flow out, or be a pulsating stream. The edges of the wound separate, exposing the inside of the torso, limbs or head. In some cases, the pain can be so severe that the person goes into pain shock.
Treatment of a wound begins mainly with providing first aid to the person. To do this, you must first determine the type of injury, its degree and depth. If the victim is bleeding, it must be stopped as soon as possible to prevent excessive blood loss. One way to stop bleeding is to apply a pressure bandage.
However, dressing is important not only at the first aid stage. In medical practice, experts distinguish two types of wound treatment:
- with bandages;
- without applying a dressing.
The second type is also called open. It is accompanied by the appearance of a so-called “crust” on the wound - a hard scab that protects the surface of the wound from bacteria and dirt entering it. On the other hand, the crust somewhat slows down the process of epithelization of the lesion, which is why it takes longer to heal. Wounds that have a large area are especially inconvenient to treat in an open manner. That is why today the most preferred method is to treat wounds in a moist environment, which does not allow the formation of a scab, and also helps remove exudate (effusion) from the wound cavity. In addition, treatment with dressings maintains the wound's moisture level, preventing it from dehydration, and prevents re-infection.
Dressing a wound is intended to provide a therapeutic effect on it, and to maintain the most comfortable environment for healing with protection from mechanical stress or dirt.
At the same time, the wound dressing should have some properties:
- when bandaging, effusion is removed from the wound, and a normal level of tissue moisture and temperature is maintained;
- the material allows air to pass through well, while retaining pathogenic microorganisms;
- the dressing does not contain toxic components;
- the material covering the wound comes off easily without drying to the wound.
Why are bandages applied to the injured person? Functions of dressings in the treatment of wounds:
- removal of exudate;
- destruction of toxins and bacteria;
- stimulating cleansing of necrosis processes;
- maintaining normal humidity in the wound;
- providing wound ventilation;
- protection from mechanical damage;
- preventing infection;
- stimulation of cell regeneration and restoration processes.
How to make a sleep mask with your own hands
To sew a comfortable sleep mask, you need to learn the step-by-step process of making it. You should be especially careful when choosing fabric. An important step is creating a pattern. Only after it is ready do they begin sewing. It will take no more than an hour to create a quality product.
Material selection
It is very easy to sew a face mask that allows you to fully rest at night. The main thing is to prepare in advance everything you will need for your work. As a rule, padding polyester, satin fabric and flannel are used. The use of other materials is also allowed. The main thing is that they are soft and do not lead to discomfort. In addition, the following tools and materials will be needed:
- an elastic band, thanks to which the accessory will be securely fixed on the head;
- cardboard;
- ruler;
- scissors;
- needles or pins for fixing the pattern on the fabric;
- bias tape, lace or beads.
How to make a template and pattern
The mask template is made in full size. Use a regular ruler to create a pattern. Perform the following manipulations:
- A rectangle is drawn on cardboard, the length of which is 19 centimeters and the width is 9.5 centimeters.
- The corners are rounded to give the desired shape.
- Make a hole in the center for the nose.
After this, they begin making the pattern. A template is applied to each type of fabric, secured with pins and traced along the contour with a pencil. A seam allowance of about five millimeters must be made on each side.
If foam rubber is used for the inner part, then there is no need to make allowances when making the pattern for this part. If padding polyester is used, it is not cut out at all. The finished product is simply stuffed with it.
All that remains is to decide on the length of the elastic, taking into account the circumference of the head. After this, the main work begins.
Sewing the main part of the mask
After all the details of the sleep bandage have been cut out, they begin to decorate its front part. For this purpose it is allowed to use:
- guipure;
- beads;
- beads;
- lace;
- thermal stickers;
- eye images.
When the front side has acquired the desired appearance, it is sewn to the inside of the mask. These actions can be performed either manually or using a sewing machine.
When using the first option, the stitches are made small, neat, similar to a machine seam.
A pair of main parts are connected to each other, but only on three of the four sides. After this, small cuts are made in the seam allowances, the resulting workpiece is turned inside out and filled with padding polyester or foam rubber. The thickness of the product ultimately varies between 1-1.5 centimeters. To complete the work with the main part, the remaining unstitched parts are stitched.
Algorithm for sewing elastic
When making a blindfold for sleeping with your own hands, it is extremely important to take a responsible approach to sewing the elastic. The same fabric is used as for the outer part of the accessory. A rectangle is cut out of it, 30-40 centimeters long and only 3-5 centimeters wide.
The resulting part is folded in half lengthwise with the front side inward. Making an indentation of three millimeters, stitch along the entire length. After this, the finished belt is turned inside out. Using a pin, an elastic band is threaded into it.
The fabric should gather a little. When the bandage is put on, the belt will straighten and take on a neat appearance.
The elastic band is secured to the fabric on both sides using several stitches. This part is then sewn to the finished mask. Perform these steps using a sewing machine. It is noted that if manually stitched, the accessory will be fragile and short-lived.
How to make a bandage
Correction of strabismus in children
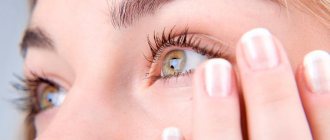
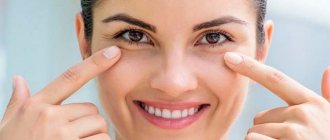
One of the methods of conservative treatment of strabismus in children is the occlusion method. If one eye is weaker than the other, it needs to be trained by increasing the visual load on it. To do this, the healthy eye is covered with a bandage every day for several hours so that the child learns to rely more on the weak eye.
The effectiveness of treatment depends on the correct individual regimen and its strict adherence. For this purpose, it is especially important that the protective device is comfortable for the child and that he willingly wears it.
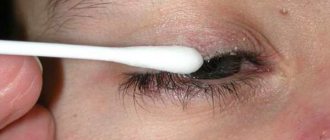
This can be a gauze pad placed over the closed eyelid and secured with a plaster on the forehead at the bridge of the nose and on the cheek. Now pharmacies sell special medical children's eye stickers - occluders.
They are made of elastic soft material, breathable and hypoallergenic. Occluders are available in plain colors and with pictures.
Protective and strengthening bandages
Most often, medical eye bandages are applied to keep the dressing material (aseptic or medicated) in the eye area. Sterile cotton-gauze pads, made independently or purchased at a pharmacy, are used as dressing material.
It is advisable to choose the thickness and shape of the pad that matches the shape and depth of the patient’s eye socket, otherwise the bandage will either put pressure on the eye or not fit well enough. Usually its thickness is about 1 cm and its diameter is 5–6 cm.
Depending on the specific situation and purpose of the bandage, there are different ways to secure it.
Adhesive dressing is widely used in the postoperative period. Its advantages are as follows:
- simplicity and quick execution;
- a small area around the eye that is covered;
- low material consumption.
After applying a dressing to the eye, the skin around it needs to be lubricated with glue (BF 6 or cleol). After a few seconds, a stretched gauze napkin is placed on top and its edges are pressed against the skin. The free edges of the napkin are trimmed. There is no need to attach an adhesive bandage to the scalp.
The adhesive bandage can last for several days. To remove it, the edges of the napkin are moistened with gasoline or ether. You can soak it with warm water, but you will need patience.
The adhesive bandage does not hold up as well, but it is even easier to apply and easier to remove. Even the victim himself can do this. To do this, you need to take a strip of plaster 10–15 cm long and fix it diagonally over the dressing on the forehead and cheek, avoiding the hairy surface of the skin.
The elastic tubular medical bandage is made of cotton yarn, latex thread and has a mesh structure. Such bandages are produced in different widths from No. 1 to No. 7. Bandages No. 5 and 6 are suitable for headbands. This bandage is very easy to apply and can be reused.
And yet, bandage gauze dressings still remain the most common and reliable means for fixing dressings. The twisted part is the head of the bandage, and the free end is the beginning. To correctly apply a bandage to one eye or both, you must have a certain skill and follow the known rules:
- bandaging begins with a securing turn (tour);
- The bandages are applied with uniform tension.
Right eye patch. Bandaging is performed from left to right counterclockwise in this order:
- Secure the bandage with two horizontal turns around the head.
- Pull the bandage down the back of the head under the right ear, move it up the side of the cheek and close the sore eye closer to the inside of the orbit.
- Secure the upward movement of the bandage with a horizontal tour around the head.
- Place the bandage again under the right ear and cover the eye, moving the bandage outward by a third of the width of the bandage.
- Secure the oblique motion of the bandage with a horizontal round.
Alternating upward and horizontal tours, completely close the eye area. After three or four returning rounds, the bandaging can be secured with a horizontal turn.
The bandage on the left eye is performed in the same order, but from right to left clockwise.
Bandage on both eyes.
- Secure the bandage with two horizontal turns around the head.
- Pass the bandage over the left ear obliquely along the back of the head under the right ear, above the right eye.
- Pass the bandage along the back of the head, above the right ear, to the right temple, across the forehead, down to the left eye.
- Direct the bandage under the left ear, along the back of the head, under the right ear, then along the right cheek, over the right eye, shifting the bandage a third of the width downward and inward relative to the previous round.
- Place the bandage over the bridge of the nose, along the forehead, left temple, along the back of the head, down to the left eye, moving inward from the previous round.
- Secure with a final horizontal round across the forehead and back of the head.
For greater reliability, each bandage covering the right or left eye can be secured with a horizontal bandage.
Source
Mask knitted from cotton yarn
The sleep bandage is also made using a different technology. An original accessory is obtained by crocheting it. The process is simple and does not cause any difficulties. Actions are carried out according to the scheme.
The product thus obtained is tied around the entire perimeter with single crochets. The remaining ends are hidden. All that remains is to sew on the elastic. It is also recommended to make a pattern for the inner part from the fabric and stitch it to the knitted base. Due to this, the mask will be stronger and softer, will hold its shape perfectly and will not let light through.
Blindfolds worn at night come in a variety of varieties. By sewing this accessory yourself, you will be able to create an unusual, stylish product. Animal masks look original. All kinds of prints and embroideries can be applied to them. It’s not even a shame to give such a creation to a loved one as a gift. The main thing is to take additional care of sewing a special case in which the bandage will be stored.