If previously photography was the preserve of a select few - the equipment was expensive, and the process of developing films was complex and painstaking, today numerous gadgets have learned how to take photographs. And our smartphone, which we part with, it seems, only while we sleep, turned out to be an excellent camera. But when photographing numerous loved ones and acquaintances, you can find an unpleasant effect in the photographs - red eyes. It is not entirely clear why this happens and how such an optical artifact can be avoided.
♥ ON TOPIC: How to automatically improve photo quality on iPhone and iPad.
How to Change Eye Color in Photoshop
Step 1: Zoom In
Select the Zoom tool from the toolbar:
Select the Zoom tool
Click the area between the eyes several times to zoom in. Press the "H" key on your keyboard to switch to the Hand tool. Then click on the image and drag it to the desired position:
Enlarging the image and centering the eyes
Step 2: Select the Lasso Tool
To change the color of the eyes without affecting the rest of the image, let's create a selection around the eyes. Select the Lasso tool:
Select the Lasso tool.
Step 3: Create a highlight around the eyes
Use it to create a selection around one of the eyes. We only need the iris (colored area) located at its center. Don't worry if the selection isn't quite right. We'll adjust it later.
Selecting the first eye.
Select the first eye and press and hold the Shift key. A small plus sign (+) will appear in the lower right corner of the Lasso tool cursor. By holding down the Shift key, you can add a region to the current selection. Create a selection around the second eye.
Press and hold the Shift key and then create a selection around the second eye.
Step 4: Add a Hue/Saturation Adjustment Layer
To change the eye color, use a Hue/Saturation adjustment layer. In the Layers palette, click the New Fill or Adjustment Layer icon.
Click on the “New Fill or Adjustment Layer” icon
Select Hue/Saturation from the list.
Select Hue/Saturation from the list.
Step 5: Select the "Colorize" option
Options for adjusting the Hue/Saturation adjustment layer appear in Photoshop's Properties panel. Activate the Toning option by checking its checkbox.
Check the box for the Shading option at the bottom of the Properties panel.
When you do this, the eyes will turn red. You need to change it as follows.
The eyes have changed color, although red is not a good choice.
Step 6: Choose a New Eye Color Using the Hue Slider
To choose a different eye color, drag the Hue slider. I set the value to 200 blue.
Choose a new eye color by dragging the Hue slider.
This is what the new eye color looks like. It's too intense, so we'll fix it.
The result after dragging the Hue slider.
Step 7: Reduce the Saturation of the New Color
Drag the Saturation slider to the left to reduce the saturation until the color is more natural. Most often, a saturation value of 10 to 15 is suitable.
Reduce the saturation of the new eye color.
Here is my result after reducing the saturation.
Eye color now looks less intense and more natural.
Step 8: Change the Blending Mode to Color
In the Layers palette, the Hue/Saturation adjustment layer is located above the Background layer. The adjustment layer's blending mode is currently set to Normal. This means that it affects not only the color of the eyes, but also their brightness. To edit just the color, change the mode to Color.
Change the adjustment layer's Blend Mode to Color.
You should see more detail in the eyes after switching the Blending Mode to Color. In my case, the eyes now appear brighter.
The result after changing the blending mode to “Color”.
Step 9: Select a Layer Mask
Adjustment layers include a built-in layer mask. We've been using it since we added the Hue/Saturation layer. Photoshop used the initial selection with the Lasso tool to create the mask. A layer mask thumbnail appears in the Layers panel.
Notice that the miniature is filled mostly in black, with two small areas of white. Blacks are areas where the Hue/Saturation adjustment layer has no effect on the image. In other words, these areas still show the original color.
The two small white areas are the selection we created around the eyes using the Lasso Tool. These are the only areas of the image that are colored by the adjustment layer. The miniature has a white backlight. This box tells you that the layer mask is currently selected. If you don't see the frame, click on the thumbnail.
Select the layer mask.
Step 10: Select the Brush Tool
If we look closely at one of the eyes in the photo, we can see that the blue areas around the edges of the iris extend into the white areas and a little onto the eyelids.
Some of the new flowers are spreading into surrounding areas.
To clean up these areas, paint a layer mask. Select the Brush tool from the Tools palette.
Select the Brush tool.
Step 11: Change the Foreground Color to Black
To hide the color around the iris, we need to paint the areas in the layer mask with black. Photoshop uses the Foreground color as the brush color.
The current foreground and background colors appear at the bottom of the tool palette. Press the D key on your keyboard to reset the foreground and background colors to their default values. This action will set white as the foreground color and black as the background color.
Foreground (top left) and background (bottom right) color swatches.
Then press the X key on your keyboard to change the colors, making black the foreground and brush color.
The foreground color is now black.
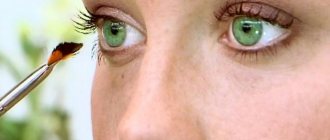
Step 12: Sketch the Areas Around the Iris
Paint the areas around the iris to remove problem areas. For best results, use a small brush with a soft edge.
You can adjust the brush size using the keyboard by pressing the "[ " key several times. This will decrease the brush size, or press the "]" key to increase it.
To change the brush hardness, hold down the Shift key and press the Left Bracket key. Holding down the Shift and Right Bracket keys will make the edges of the brush harder.
We're painting on the layer mask and not on the image itself, so we can't see the brush color. Instead, the new eye color disappears from the painted areas.
Paint in black the areas around the edges of the iris.
To leave the pupil area untouched, change the brush size and paint the areas inside the eye with black. Once you're done with the first eye, move on to the second.
Sketch the areas inside the pupil.
Red eye effect
The Tik Tok mobile application is constantly updated, replenishing the stock of unique masks. One of the new features is the red-eye effect. You can make red eyes in Tik Tok directly in the program for your mobile device or through Photoshop.
The red-eye effect can be created using a smartphone flash or through special filters. In addition, after recording a video, the user can select filters for the page to attract more attention to the video.
To create a red eye effect, follow these steps:
- open camera settings;
- Find the Red-Eye Reduction item and turn it off;
- then launch the TikTok application on your smartphone;
- create a new publication;
- turn on the flash;
- find additional filters with devil horns;
- start shooting.
The effect of the video will be irresistible. But there are a couple of nuances regarding filming video. To begin with, the front camera of the smartphone must have a flash. It is recommended to shoot video in a dark room, with the light source coming from the side of the user. To do this you need a small spotlight or flashlight.
The same procedures can be carried out with the main camera of a smartphone. Problems may arise with more modern types of devices that come with red-eye correction pre-installed. In this case, you will have to use another phone to record video. After filming, transfer the video via Bluetooth or Internet connection and publish it on Tik Tok. However, this manipulation will not allow the use of additional filters.
Comparison of the new eye color with the original
To compare the new eye color with the original color, turn off the Hue/Saturation adjustment layer by clicking the visibility icon in the Layers palette.
Click on the visibility icon.
With the adjustment layer turned off, the original eye color will appear.
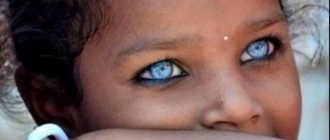
Original eye color.
Click the visibility icon again to turn the adjustment layer back on and preview the new eye color.
New eye color.
So, using Photoshop, you can change the eye color in a photo using a Hue/Saturation adjustment layer!
This publication is a translation of the article “How To Change Eye Color With Photoshop”, prepared by the editors of the project.
Make “black eyes” and devil horns
On the social network, there are more than five lenses in special filters that can use devil horns of various sizes and shapes. It is recommended to use such specific filters in combination with the black eye effect. A distinctive feature of black eyes is considered to be high picture quality even in low light.
To activate the filter, you will need to do the following:
- open the application and go to create a publication;
- masks will be located on the left;
- open the Trending folder;
- find the Black Eyes effect among them.
Attention: to make the Tik Tok eye filter look natural, adjust the lighting and preferably use a tripod when shooting. The filter with the devil's horns must be found using an identical algorithm of actions.
Origin
The Agatha Christie group released the album “Post Album” in 2000, which included the song “Crawling” as a bonus track. In it, the word “creeps” is repeated 40 times.
In August 2008, a video appeared on YouTube with a creepy bunny and words in which some letters were replaced or mirrored. This format is called “BezNOGNM”.
On December 29, 2021, a public page glaza / polzet appeared on VKontakte with abstract memes combining inscriptions with inverted letters and Unicode and numerous repetitions of the words “Glaza polzet”.
On January 1, 2021, another public page, GlaZa Po̦̹l̼̰̖͕̪̬z͉̗̰̼e͉̺͕̖͡t, appeared, which continued to develop the theme of scary black and white memes with eyes.
On February 10, 2021, a public page “o6pe4en” (@o6pe4en) appeared on VKontakte with creepy memes of a similar format.
As its creator, Sta Loschov, told Memepedia, he was offered to buy a public site, and after refusing, they started a clone “o6pe4en” (@o6p343n). 18 thousand people signed up for it.
In response, Stas and his friends made another public page, o6pe4en, which now has 82 thousand subscribers.
In March 2021, the trend for such memes became quite widespread; other public pages began to appear on VK with the words Glaza polzet and different spellings of “doomed” in the title. Also, memes of this format began to be published in popular communities with a population of millions. For example, 4Chan.
Method 3. Using Channels
This is also a good way to change your eye color from red to normal.
First, highlight the eyes.
Open Channels . _ _ Turn off all channels, leave only blue and switch to it. Press CTRL+C to copy the selected pupils.
Go to the red channel and press CTRL+V to paste what you copied.
Go to the green channel and paste it too by pressing CTRL+V .
Enable all other channels including RGB .
You need to choose the method in which you will remove red eyes from a photo based on the photo you will be working with. In some places you can work with standard Photoshop tools, but in others you will have to work more carefully and in more detail. These are the three simplest and most common methods.