Congenital eye pathology, which is expressed in albinism or heterochromia, can be corrected through surgery.
Thanks to artificial implants or laser correction, it is possible to regulate the level of melanin in the tissues of the iris. This method is also practiced for aesthetic purposes. The features of the operation to change eye color will be discussed in the article.
Changing eye color through surgery - truth or myth?
If you are not satisfied with the color of the iris or there are pathologies that affect the level of melanin in the tissues of the organ of vision, you can correct the situation through surgery. Currently, this trend is gaining momentum; anyone who wants to add something new to their image can become the owner of eyes of incredible color.
The operation is painless. It is carried out using local anesthetics. The risk of complications is minimal, as proven by research data. However, both the method of implantation and laser manipulation have certain risks.
Therefore, qualified ophthalmologists who first examine the eyeball and become familiar with the data of diagnostic procedures can prescribe surgical intervention.
Reference! The technique for changing the color of the iris is new. It has not been fully tested, but is already being practiced in America and Europe.
What should I do to change the color?
Use of implants
The technology involves the introduction of a silicone iris on top of its own.
K. Rosenthal proposed a technique by which you can change eye color by inserting a round plate of silicone material into the eyeball over the colored iris. There is a special hole in the pupil area. The method does not modify the eye diaphragm, and therefore the original tone can be restored in the future. Medical procedure lasting 30 minutes. performed under local anesthesia to lighten dark eyes or change the color to a blacker one. The method will be used to restore visual abilities in case of deviations, such as:
- change in the shape of the pupil or movable diaphragm of the organ of vision;
- heterochromia;
- a different color change in one of the eyes;
- reduced amount of pigment in the diaphragm of the visual organ.
However, the procedure has the following disadvantages:
- the risk of developing glaucoma and cataracts increases;
- possible retinal detachment;
- after the procedure, a long recovery period is indicated;
- implants look unnatural due to the lack of a pattern;
- During surgery, infection of the mucous membranes and the development of an inflammatory process may occur.
Surgical intervention
To change color, an operation is performed that includes the following steps:
The initial stage of the procedure involves gaining access to the patient's native iris.
- Under anesthesia, the cornea is peeled off to provide access to the eyeball.
- A rolled silicone implant is inserted.
- The material in the iris area is straightened and fixed on the sides.
- The tightness of the eye is restored.
How does the laser change the color of the iris?
Since the color of the visual organs depends on the concentration of pigment, the destruction of melanin makes the irises lighter. The laser was primarily used to enhance visual abilities and treat heterochromia and cataracts, but the device is also recommended for purely cosmetic purposes. It is important to consider that if you reduce the amount of melanin, the change in color of the iris will be permanent, since the pigments are not regenerated. The technique is suitable for dark irises, but is ineffective for owners of blue eyes. Laser treatment consists of the following stages:
- computer scan of the iris;
- visualization of eyes of a different color that the patient will receive;
- display of a specially selected video sequence for 20 seconds;
- burning of pigments, which takes 1 minute, under local anesthesia;
- postoperative period lasting 3-4 months.
After using laser technology, the organs of vision may be overly sensitive to light.
However, the procedure may have the following side effects:
- reduce visual acuity;
- increase the risk of developing glaucoma;
- sharpen the reaction to light;
- increase the concentration of eye fluid.
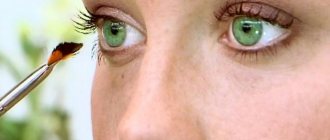
Drops to change the color of the iris
Light eyes can be turned brown through long-term use of eye medications. Doctors prescribe hormonal drops for glaucoma. The most popular are called “Latanoprost”, “Unoprost”, “Bimatoprost” and “Travoprost”, containing a substance similar in composition to prostaglandin. A change in eye color occurs after 1-2 months. Blue, green eyes turn into brown only with daily use with strict adherence to the dosages prescribed by the ophthalmologist.
Self-administration of medications is prohibited, as drops can reduce visual acuity and disrupt the nutrition of the eye. As a supplement, you can apply the substance to your eyelashes to make them grow faster. The advantage of the product is the ability to use it at home without hospital supervision from doctors. It is impossible to make the iris lighter and brighter with the help of medications, since the action of the drugs is aimed at increasing melanin.
Diet food
At home, to make the color of the iris more saturated or change the color, you can include in your diet the following products presented in the table:
| Products | Effect |
| Mountain honey | Brown eyes become blue, blue, gray |
| Spinach | The appearance of a pronounced color |
| Fish | |
| Nuts | The color changes to more saturated |
| Olive oil | Creating a soft tide |
| Ginger | The iris becomes darker |
| Chamomile | The organs of vision are given a warm tint |
Color contact lenses
To improve the properties of the eyes, it is recommended to wear medical devices that have diopters that enhance visual acuity, which replace glasses.
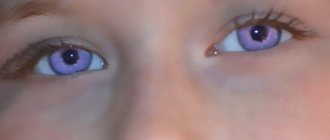
Ophthalmic agents that change eye color can make the natural tone richer or completely change the color. Simple multi-colored lenses are placed without surgery and allow you to quickly achieve the desired effect. Thanks to them, you can get non-standard colors, for example, make purple eyes or change only one eye. Ophthalmic devices are divided into colored contact lenses and tint lenses. For costume parties, you can make the eyes red, black or with a special design. It does not take much time to learn how to use a device made of soft material. It takes a few minutes to insert into the organs of vision. The advantage is the absence of side effects, however, contact lenses must be regularly washed with disinfectants and removed at night.
Indications for use
The main indications for surgery to change eye color are diseases of the iris. This is albinism, when pigmentation of the iris tissue is completely or partially absent, as well as heterochromia, in which the left and right eyes are different in color. These pathologies are characterized not only by a cosmetic defect, but also by a physical one:
- visual acuity decreases;
- Glaucoma and other serious diseases develop.
Melanin is a pigment in the tissues of the iris. It does not have the property of regeneration, so the only way to correct the defect without surgery is with colored lenses. But this method requires repeated replacement of optics, daily care and other measures. This is inconvenient if you constantly use lenses. The operation helps to cope with the problem in a matter of days.
How to Lighten and Highlight Your Eyes Using Photoshop CC and CS6
Step 1: Add an Adjustment Layer
Before we begin, let's take a quick look at our Layers panel, where we can see our photo sitting on the Background layer. At this point, the Background layer is the only layer in the document:
The Layers panel showing the photo on the Background layer.
To make the eyes brighter, we will use a Levels adjustment layer. To add it, click on the New Fill or Adjustment Layer at the bottom of the Layers panel:
Clicking on the "New Fill Layer" or "Adjustment Layer" icon.
Then select Levels from the list:
This is interesting: Guides for correcting tone and color
Selecting the Levels adjustment layer.
Nothing will happen to the image yet, but if we look at the Layers panel again, we can now see our Levels adjustment layer, named Levels 1, located above the Background layer:
The Layers panel showing the adjustment layer above the image.
Step 2: Change the Layer Blending Mode to “Screen”
The options and controls for the Levels adjustment layer appear in Properties panel safely ignore them since we don't need them for this effect. Instead of brightening the eyes, all we need to do is change the adjustment layer to its blending mode.
You'll find the Blend Mode option in the top left corner of the Layers panel. By default, the blending mode is set to Normal. Click on the word "Normal" and change the blending mode to Screen :
Changing the blending mode of the Levels adjustment layer to “Screen”.
Once we change the blend mode to Screen, the entire image will become brighter. The only problem is that the entire image is now brighter. All we really want to do is brighten the eyes, so we'll fix that problem like this:
Screen blend mode instantly brightens the entire image.
Step 3: Fill the Layer Mask with Black
One of the many great things about adjustment layers in Photoshop is that each one has its own built-in layer mask. We can use a layer mask to easily control which areas of our image are affected by the adjustment layer. In other words, we can use it to keep the brightening effect in the eyes but hide it everywhere.
If we look at the adjustment layer in the Layers panel, we can see its layer mask thumbnail . The thumbnail shows us a small preview of what the layer mask looks like at the moment. Notice that the thumbnail is filled with white , and that's because white is the default color for the layer mask:
A thumbnail of a layer filled with white.
The way a layer mask works in Photoshop is very simple. The white areas on the mask represent areas where the layer's content is 100% visible in the document. The black areas on the mask represent areas where the layer's contents are 100% hidden. The reason we see the Levels adjustment layer's effect throughout our image is because its layer mask is filled entirely with white.
We can hide the effect of the adjustment layer across the entire image by filling the layer mask with black . To do this, go up to the Edit menu in the menu bar at the top of the screen and select Fill :
Go to Edit > Fill.
This will open the Fill dialog box in Photoshop. Change the Content at the top to Black , then click OK (note: if you're using Photoshop CS6, change the Use to Black ):
By changing "Content" to "Black" in the Fill dialog box.
If we look at the layer mask thumbnail again, we can see that it's now filled with solid black:
The layer mask for the adjustment layer is now filled with black.
And since the black color on the layer mask hides the effect of the adjustment layer, we can see the photo again as it originally looked, without any highlighting applied:
Return to original photo.
Step 4: Select the Brush Tool
To bring the brightening effect back into the eyes, we need a way to paint just these areas of the mask with white, and the easiest way to do this is to paint over them with a brush. Select Photoshop Brush Tool from the Tools panel:
Selecting the Brush tool.
Step 5: Paint white inside the eyes
We'll need to paint with white , since the white color on the layer mask reveals the contents of the layer, which means we'll need to make sure our brush color is set to white first. Photoshop uses the current Foreground color as the brush color. We can see our Foreground color (and our Background color) in the two color swatches at the bottom of the Toolbox. The foreground color is the swatch in the top left corner.
Since the default foreground color is white, there's a good chance you're already done. But if your Foreground color is not set to white, press the letter D on your keyboard to reset the Foreground and Background color values to their defaults, making your Foreground color white and your Background color (which we don't need to worry about) black . :
This is interesting: Photoshop Black and White Conversions: Adjusting Hue/Saturation
Make sure your Foreground color (top left swatch) is set to white.
To make it easier to see what I'm doing, I'll bring my eyes closer. To do this, I'll press and hold the spacebar and the Ctrl (Win) / Command (Mac) key on my keyboard. This temporarily switches me from the Brush Tool to Photoshop's Zoom Tool. I'll click a few times in the area between the eyes to zoom in. Then I'll switch back to the Brush Tool by releasing the keys:
Enlargement in the eyes.
Now that we've zoomed in, using the Brush Tool in hand and white as your brush color, simply paint over the iris (the colored area in the center) of each eye to brighten them up. You'll need a small brush for this, and the fastest way to adjust the brush size is from your keyboard. Pressing the left bracket key ( [ ) will decrease the size of the brush each time you click it, and pressing the right bracket key ( ] ) will increase the size of the brush.
You also want the edges of your brush to be fairly soft. To adjust the hardness of the brush, hold down the Shift the left bracket key ( [ repeatedly to soften the edges. Holding Shift while pressing the right bracket key ( ] ) again will make the edges of the brush harder.
Since we're painting on a layer mask, you won't see the brush color as you paint. Instead, you'll see a brightening effect from the adjustment layer being expanded. Here I'm drawing inside the eye on the left:
A picture of the inside of the iris of the first eye.
Don't worry if you accidentally paint over the white part of the eye or the eyelids because we'll clean it all up later. Here's what my first eye looks like after drawing around the entire iris:
The first eye cleared up.
Once you've lightened the first eye, move to the other eye and do the same, painting the inside of the iris white to show the lightening effect:
Both eyes are now clearer.
Step 6: Set Foreground Color to Black
We brightened the eyes, but we also most likely lightened some areas around the eyes. To clean up these unwanted areas, all we need to do is paint them black . To quickly change the brush color from white to black, simply press the letter X on your keyboard. This will swap the Foreground and Background colors, making your Foreground color (and brush color) black:
Click "X" to change the foreground and background colors.
Step 7: Draw around the eyes
Then, using a black brush, paint around the eyes to hide any highlights in the white part or on the eyelids. Here I'm drawing around the left eye:
Cleaning the area around the first eye.
If you make a mistake and paint over part of the iris brightness, simply press the letter X on your keyboard again to change the foreground color to white and paint over the area to fix it. Then press X again to change the Foreground color to black and continue painting the unwanted areas. Here I am cleaning the area around the right eye:
Cleaning the area around the other eye.
Now that I've cleared my eyes, I'll zoom out to see the entire image. To do this, I'll go to the View menu in the menu bar at the top of the screen and select Fit to Screen . Or I could press the keyboard shortcut, Ctrl + 0 (Win) / Command + 0 (Mac):
Go to View > Fit on the screen.
Here's what my image looks like with my eyes cleared:
Eyes now look brighter.
View a layer mask
Now that we've cleared up the eyes, if we look at the layer mask thumbnail again in the Layers panel, we can see two small white areas where we filled in the eyes. These are the only two areas where the effect of the adjustment layer shows through:
The layer mask thumbnail shows us where we painted with white.
In fact, if we press and hold the Alt (Win) / Option (Mac) key on our keyboard and click on the layer mask thumbnail :
With the mask thumbnail pressed Alt (Win) / Option (Mac).
The photo will be temporarily replaced by the layer mask itself, making it easy to see exactly where we painted:
The layer mask is now visible in the document.
your Alt (Win) / Option again and click on the layer mask thumbnail :
Click on the mask thumbnail again while pressing Alt (Win) / Option (Mac).
The layer mask will disappear and the photo will reappear:
The image returns.
Step 8: Lower the Layer Opacity (Optional)
If you find that your eyes now look too bright, it's easy to adjust the brightness. All we need to do is reduce the opacity of the Levels adjustment layer. You'll find the Opacity in the top right corner of the Layers panel (right next to the Blending Mode option).
By default, the opacity value is set to 100%. The more we lower it, the more we allow the original photo to show through on the Background layer, reducing the impact of the adjustment layer. Monitor your image as you lower the opacity to find the value that works best. In my case I will reduce it to 75%:
Lower the opacity of the Levels adjustment layer.
Before and after
To compare the result with the original image, simply click the visibility icon (eyeball) for the Levels adjustment layer in the Layers panel:
Clicking on the visibility icon of the Levels adjustment layer.
This turns off the adjustment layer, allowing us to view the original image:
Original photo again.
To turn an adjustment layer back on, click its visibility icon (the empty square) again:
Click the visibility icon again.
And here, with an even more noticeable brightening effect, is my final result:
Final result.
What eye color can you get?
If you want to change the color of the iris using the laser method, it is impossible to predict the final result. This is due to the following factors:
- individual feature of the visual system;
- melanin concentration level;
- desired tonality.
The process also depends on the qualifications of the doctor who prepares and performs the operation. Even the equipment plays an important role. And yet the main factor is the individual reaction of the iris tissue to the laser.
As a result, we manage to get the following options: walnut, gray, gray-green, gray-blue. If the natural one was not too dark, then the chances of getting blue eyes increase many times over.
Reference! Transformation of the color of the iris using laser surgery is only possible when switching from brown eyes to lighter colors.
If there is a desire to give the iris a certain color, then this can only be done with the help of implants. In this case, the original eye tone does not play a role. The color range during surgical intervention becomes available in almost any design.
When choosing implants, it is worth considering that the silicone plate is a foreign body. Living tissues of the visual system can reject it. Over time, the implant needs to be changed. So you should think it through carefully before making a decision.
Why does everyone have different eye color?
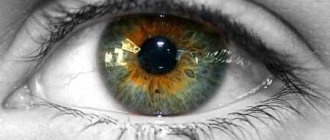
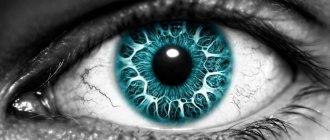
Eye color depends on the amount of melanin on the surface of the iris, which is formed during the prenatal development of a person and depends on hereditary factors. If the accumulation of melanin is large, then the eyes become black or brown, if a little less - green or amber. When there is no melanin in the iris, light reflection results in blue or gray eye color. Indications for the operation:
- heterochromia - when a person’s eyes are colored different colors;
- aniridia - absence of the iris;
- dissatisfaction with your own eye shade.
Types of operations to change eye color
If the method of introducing changes to your image using lenses is not suitable, you should consider the following options.
Implant installation
This is a surgical procedure during which a thin silicone plate is inserted through a small incision in the cornea. The main advantage of the method is that the result is predictable. The patient chooses the tone independently. Moreover, you can change the color not only from a dark tone to a light one, but also vice versa.
After removal of the implant, the native shell remains the same. If the tissues were not damaged while wearing the silicone plate, 100% functionality of the visual apparatus is maintained.
Laser correction
The color of the iris depends on several factors, as well as the individual characteristics of a person. But melanin has the main influence on tonality and shading. Brown eyes contain a high concentration of pigment. In light irises the amount of melanin is much less.
The main task of the laser technique is the destruction of natural pigment molecules. Passing a laser beam along the outer layer of the iris helps destroy melanin. The laser acts gently, destroying only the coloring matter, while the shell itself remains unharmed.
After the operation, the iris darkens, which is especially noticeable in the first week. After a month the shade becomes lighter. This is how a brown-eyed person becomes the owner of blue eyes. The result is irreversible.
Several sessions are required to destroy melanin molecules. The transformation of brown irises into blue is carried out in about 10 treatments.
New procedure will turn your brown eyes blue
The science
If you had the opportunity to change your eye color, would you take advantage of it? Now answer the question again, taking into account the fact that you will need to shell out $5,000 for the procedure and undergo a short course in eye surgery.
Do you still want to do this? Obviously, the answer for most people will be no.
However, one doctor is confident that the method he proposes may be of interest to many. Gregg Homer, a California doctor, says he spent 10 years developing technology to improve laser treatment, making it easy to turn brown eyes blue.
Homer agrees that the eyes are the window to the soul, but he emphasizes that, in his opinion, blue is a more preferable shade and appears less transparent than darker colors. Essentially, he says that blue eyes allow others to look into them "more deeply."
Here's how the 20-second laser procedure works: a computer scans the iris of the eye, and the laser "rips" brown pigment from the surface of the eye. Since the blue pigment lies underneath the brown, removing the outer layer makes the eye color blue. Homer says that the procedure is natural, and after 2-3 weeks, the eye color turns from brown to blue.
When addressing questions about the risks associated with the procedure, Homer said he uses 15 complex tests to ensure that no tissue is damaged and that the procedure is completely safe. However, already when answering the next question regarding whether any complications may develop in the future, he answers that they can. Additionally, other doctors point out that Homer is probably being disingenuous when he says he doesn't know there are long-term effects of his laser "treatment." One New York ophthalmologist, Robert Cykiert, confirmed that the procedure is very risky.
“When the brown pigment is burned, the debris that forms on the front of the eye looks like a kind of ash that clogs the microscopic channels of the trabecular meshwork,” says the ophthalmologist. “This, in turn, may cause high pressure in the eye, known as glaucoma.”
Oddly enough, one of the methods of treating glaucoma is surgery.
Homer himself says that he has already tested the technology on animals, human corpses and volunteers in Mexico. The method, called Lumineyes, was launched within Homer's company, Stroma Medical Corporation. He estimates that the procedure will be available outside the United States in as little as 18 months, although it may take longer to get approval for the procedure to work in the United States.
In addition, using technology, you can only turn brown eyes into blue; other colors are not available for processing.
How is the operation performed?
The main stages of the surgical operation:
- administration of local anesthesia;
- fixation of the upper eyelid;
- incision of the corneal membrane near the base;
- installation of a silicone plate between the membrane and the cornea;
- suture;
- prescribing eye drops for further recovery after surgery.
Changing the tone of the iris using a laser is carried out in stages in several sessions. After the 7th procedure, the lightening of the eye tissues becomes noticeable. But the final result is assessed after 1-6 months.
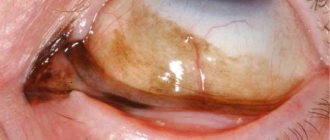
Iris implantation
Installing a silicone implant is not so much a surgical change in eye color as a way to change structural defects, which often create very noticeable vision problems.
If laser surgery is performed using special binoculars under local anesthesia, then inserting the implant is much more difficult. However, it can be made in any shade. The most popular options available are:
- green;
- turquoise;
- ultramarine.
To insert an implant, you will certainly need the conditions of an ophthalmology clinic and a special tool. The operation must be performed by an experienced surgeon, who will cut the iris at the base and insert the implant, deploying it between the membrane of the eyeball and the cornea.
To watch a video of how the operation to implant an artificial iris takes place:
Further events
The success of surgery to change the color of the iris depends on the qualifications of doctors, the quality of equipment and compliance with the rehabilitation regime.
Rehabilitation
For a quick recovery, doctors recommend following the following recommendations after surgery.
- Follow the regimen of administering drops prescribed by a specialist.
- Protect your eyes from sunlight, wind, dust. Sunglasses are used for these purposes.
- Follow the rules of hygiene to prevent infection of the organ of vision.
- Avoid heavy loads. This restriction applies to physical labor and sports.
- Prevent visual stress (TV, reading books, gadgets, etc.).
- Avoid going to the solarium, swimming pool, or bathhouse.
Possible complications
Due to the fact that operations to change eye color have been practiced not so long ago, all data on complications and limitations are based on the results of studies that were carried out during the development of the technology. According to this information, surgical procedures cannot cause serious complications.
The opinion of some experts contradicts research data in the sense that such manipulations can have a negative effect on vision. The hypotheses are based on the theory that after a significant decrease in the concentration of melanin, the eye becomes sensitive to ultraviolet radiation. Among other things, due to clogging of the canals, which occurs against the background of melanin removal, intraocular pressure increases. This can lead to the development of glaucoma.
After implantation, the following negative manifestations are possible:
- photosensitivity;
- corneal detachment;
- loss of vision;
- severe itching of the eyelids;
- increase in IOP.
Changing the shade of the iris using an implant
This operation was invented by ophthalmic surgeon Delary Alberto Kahn. In 2006, he received a patent for this surgical technique. This procedure was originally used for patients with eye defects, such as ocular albinism or coloboma, but later it became available to all other people who simply wanted eyes of a different color. You can change the shade to absolutely anything - from traditional blue and green to brighter and more original tones, for example, amber or purple. The procedure is carried out in 4 stages:
Stage 1. The patient is placed on the operating table and an anesthetic is instilled into the eyes. Stage 2. The doctor cuts the iris near the base. Stage 3. A disc-shaped silicone implant of the desired color is installed between it and the cornea. 4. Next, stitches are applied and the operation ends.
The advantage of this method is that the implant can be easily removed if the patient suddenly changes his mind and wants to return his eye color. Unfortunately, like any operation, it has its complications. Possible risks include:
- loss of vision, ulcers and corneal detachment;
- increased intraocular pressure;
- intolerable itching of the eyelids;
- headache;
- photosensitivity;
- allergy;
- glaucoma, cataract.
How much does it cost to change eye color?
In America, surgery to change the color of the iris will cost about $5,000. In Europe – approximately 3,000 euros. A leading clinic in Turkey offers laser surgery for 4,800 euros. The price is for 10 sessions. But the final cost of the procedure is calculated individually depending on the concentration of natural pigment in the iris tissue.
Since the method is under development, this procedure is not offered in Russian clinics. However, according to experts, it will soon become available to a wide range of patients. The predicted price is about 70,000 rubles.
Contraindications
Methods that make it possible to change the tonality of the iris are experimental. Only the test of time will reflect the real risks and difficulties that intervention in the eye tissue provokes. But it has already been proven that these manipulations should not be carried out in the following cases:
- if glaucoma is diagnosed or there is a genetic predisposition to the disease;
- for diabetes mellitus;
- in the presence of cardiovascular pathologies;
- if the patient has a mental disorder (panic attacks, unstable mental mood).
Infancy is also a contraindication.
Reviews
- Olivia, 39 years old
In a Turkish clinic I had laser surgery to change the color of the iris. I decided to change the natural walnut color to blue. It took 8 sessions. The duration of treatment for each iris is approximately 25-30 seconds. There is no pain or discomfort during manipulations. The final result could be assessed a month later. The result is a heavenly shade.
- Anetta, 25 years old
The desire to get emerald eyes has been pursuing me for a long time. Finally the dream has come true! The operation to implant fabulously beautiful implants was performed by highly qualified doctors. No complications were observed after surgery. The tissues did not reject the foreign body, so the rehabilitation was successful. I chose this method because of the opportunity to choose exactly the desired color, and not ephemeral expectations.
Video about surgery to change eye color:
Rehabilitation
Any surgical intervention implies possible iatrogenic complications. If the operation is performed efficiently, after changing eye color with a laser, within a month the patient can observe how the destroyed pigment disappears and the iris acquires the coveted shade of blue.
Recovery after surgery to install an implant will take more than 2 months. After this, you must be careful:
- wear special glasses;
- instill prescribed drops;
- avoid any stress;
- leave your usual activities for a long period.