Fabric for the mask - about 25 -30 cm wide and 50-60 cm long - this is for the outer and inner layers of the mask, do not forget that it should be a natural material - breathable and preferably hypoallergenic, since it comes into contact with the skin of the face
Fabric for mask filler - it’s better if it’s natural too
Non-woven fabric - 25 cm by 20 cm in size, so that the mask is more rigid and holds its shape
Elastic band - about 30 cm - 2 cm wide (then adjust as much as needed for you)
Scissors
Sewing machine
Let's get started:
Using the pattern, we cut out two pieces for the outer and inner layers of the mask and two filler pieces - you can take cotton knitwear, for example
Then you need to cut a rectangle out of fabric - preferably thin - this will be our “case for an elastic band” and so that it is not very thick, you need to take a thin fabric, maybe chiffon, dimensions in the photo
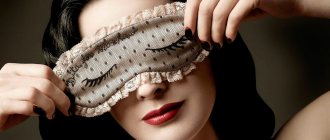
How to make a sleep mask with your own hands - step by step with photos
1. Fold the fabric for the “case” in half lengthwise with the right side inward and lay a line, retreating 7-8 mm from the edge
2. Then we turn our “case” inside out - it’s ready, you can insert an elastic band inside
3. Making mask layers:
* first the filler - we glue one of the filler patterns with non-woven material so that
the mask kept its shape
* I collect the layers of the mask - filler, elastic and outer layer - you should get four layers
4. I sew, retreating from the edge by 7-8 mm, there is no need to sew up the section in the area of the nose (about 3 cm) - we will turn our mask inside out through it
5. Turned inside out and straightened well - the area through which we turned inside out is sewn up with a hidden seam
6. Iron it - our mask is ready
What is it for?
A properly selected mask ensures good sleep, because proper rest is extremely important for health. It is at night that the bulk of vital processes take place.
- Skin cells are restored and renewed;
- Collagen is produced, which is necessary for healthy joints and spine;
- Hormones are synthesized;
- Processing information received during the day and converting it into long-term memory;
- Enhanced removal of harmful substances;
- Improving brain, nervous and immune system function.
_
All these processes take place at night, and pitch darkness is a prerequisite for their implementation. Since melatonin is produced only in such circumstances, the slightest penetration of light onto the pupil leads to the destruction of the element.
Who is advised to wear
Most live in insufficiently darkened rooms. Or they do not provide the curtains with the required density. A bandage may correct the situation.
The mask is recommended during the summer season . An early dawn can provoke involuntary awakening, disrupting the integrity of rest.
Fabric that protects from external irritants is useful for people living with families. Often the lifestyle or actions may not coincide with cohabitants. Sometimes a child oversleeps during the day, making it difficult to sleep at night. Sometimes your partner falls asleep later. Then the mask is able to create the illusion of privacy and darkness, despite the external environment.
A sleep band will be needed for people whose work involves frequent travel and business trips . It helps you sleep even in road conditions during a long stay in transport.
Those who practice yoga and meditation will also find this accessory useful. Meditation involves going deep into the subconscious. A headband can reduce the impact of distractions.
How to use
To make using the mask as comfortable as possible, follow a few simple recommendations.
- Put the mask on your head before going to bed . In a sleepy state, doing this is inconvenient and annoying.
- Raise the mask to your forehead . Then it's easier to lower it after you lie down and get ready for bed.
- Turn off the lights, lower the mask over your eyes . Check whether the bandage fits comfortably and whether anything needs to be adjusted.
- When you wake up, immediately remove the bandage . Otherwise, you may inadvertently injure yourself.
Put on a mask after preparing yourself.
Lay down in bed and try to relax. It is advisable not to use electronic devices – smartphone, computer, TV – before going to bed. They create additional strain on vision.
Note! If you plan to sleep in transport or a public place, then you will need earplugs or headphones.
Embroidered mask
Which material to choose
The mask (bandage) must be made only from suitable fabric . It is important that the selected material is pleasant specifically for the skin of your face (apply the fabric to your cheek to choose the appropriate option).
You can use different materials to make a mask.
Table: fabrics from which it is better to choose a sleep mask
| Name | Short description |
| Polyester | Thick artificial fabric. It is lightproof and easy to maintain. It does not absorb moisture very well, and therefore it is better not to use polyester for the layer adjacent to the skin. |
| Silk | Delicate and light material, has high thermoregulation and a rejuvenating effect. The skin under the silk mask fully “breathes.” |
| Linen | It has a relaxing and calming effect, an excellent option for a night blindfold. |
| Cotton | This natural material has optimal properties: it is lightweight, breathable, and hypoallergenic. |
Stages of creating a simple sleep mask
Decide in advance on the material and decor of the product, and then proceed to the main thing - making a sleep mask with your own hands. You'll probably find the step-by-step instructions below helpful.
Fillers: padding polyester or gel
Eyecups for sleeping with padding polyester are considered a universal option. They have the following characteristics:
- long service life;
- strength;
- environmental friendliness;
- safety.
In addition to their main function, gel pads also help smooth out wrinkles, normalize muscle tone, relax and relieve fatigue.
How to make a sleep mask: the fastest and easiest way
Every person needs rest, and in order to fall asleep as quickly as possible, you need to try to limit surrounding irritants. External irritants include noise, bright light shining in the eyes, cold or heat.
To eliminate noise, earplugs are used; if it is cool, a person hides under a warm blanket, but if it is too hot, he turns on the air conditioner or fan, but what about the light? First of all, curtains or blinds are closed, doors are covered, and for perfect darkening, special blindfolds are used.
Today we intend to show you how to make a sleep mask with your own hands at home without using a sewing machine.
Types of dressings
A personal sleep mask can be selected according to several parameters:
- Material
- Filler
- Design
- Manufacturer
For each of them there is a list with advantages and disadvantages.
Everyone can handle the task, but you still need to carefully choose the right model.
1. When choosing a material, it is worth considering its tactile characteristics. Masks are made from natural or synthetic fabrics. The latter is much cheaper and their service life can be longer. But their use is associated with a number of risks. They can cause irritation, chafing, and allergies. And also unpleasant itching. The disadvantage of natural fabrics is their high price and careful handling. But they do not cause negative reactions when in contact with the skin. The most popular are cotton and silk headbands. A silk sleep mask, like a cotton one, is soft, comfortable, and easy to wear.
2. Often the preference depends on the content of the eye accessories. Overlays can be gel or padding polyester. Material filled with padding polyester will last a long time. It is safe and harmless. But a sleep mask with a gel insert performs additional functions. They help wrinkles smooth out, maintain muscle tone and maintain healthy pigment.
3. Many characteristics are laid down during sewing at the manufacturer’s factory. You should take into account the features of each branded model and what their varieties are called.
Special pads for women
Sleeping blindfolds are often equipped with additional inserts that help solve all sorts of cosmetic problems:
- gels relieve puffiness and smooth out wrinkles;
- magnetic disks reduce muscle tone and stimulate the process of skin regeneration;
- the presence of tourmaline threads has a beneficial effect on the activity of the nervous system and the blood circulation process. With their help, it is possible to get rid of dark circles under the eyes;
- fabric impregnated with copper oxide creates a barrier to the formation of wrinkles and smoothes the epithelium.
Night covers are a necessary and easy-to-use accessory. Thanks to their use, it is possible to improve overall well-being and get a good night's sleep. This in turn will have a positive effect on your health, mood and appearance.
Ideas
At the first stage, you should decide on the dimensions. The mask should be at least 20cm wide and 8-10cm high. In order to perfectly determine the desired size, you should draw a sketch on paper and cut it out. After that, try it on and decide whether it is chosen correctly or not.
At the second stage, the material is selected. The main criterion is convenience. If it is unpleasant to the skin, then the mask may not have any effect, since the material will cause discomfort. What you should pay attention to:
- cotton fabrics are breathable, hypoallergenic, lightweight;
- in second place are linen fabrics, they are denser, but due to this, maximum fit and density are achieved;
- if you use silk, then as a relaxation. The fabric itself is very light and delicate;
- Polyester masks are cheap, but they have both pros and cons. Polyester does not absorb moisture well and is not very pleasant to the body. Therefore, it is recommended to use it as the top layer of the product.
You can immediately select accessories, braid, fringe, openwork inserts, rhinestones, cords for tying or elastic.
First, a pattern is printed or drawn. It is better to use thick cardboard for these purposes. The template is applied to the material, two parts of the mask are cut out. Then you need to fold them, insert an elastic band and glue them. Sew the main parts of the mask. When the mask is ready, you can decorate it by gluing tape around the perimeter.
Sleep masks are popular not only among women, but also among men. Their rhythm of life is quite high, sometimes they need help to relax and fall asleep quickly. The men's mask differs in size and design. You can sew a simple black mask or find a suitable old fabric with a print (an old T-shirt) and use it as a base.
For an individual design, you can easily contact the photo department, where they will print out the desired print with the inscriptions:
- the subscriber is temporarily unavailable;
- reboot;
- the king is resting;
- loading dreams.
Healthy sleep - basic rules
There are 4 phases of sleep and they are all different in duration and intensity.
When a person covers himself with a blanket, the production of the hormone melatonin begins, the sleep hormone, which forces us to fall asleep well; if it is not produced, then the person cannot fall asleep,
First stage of sleep
this first phase is the shortest, about 10 minutes, but the most important, because without it you, in principle, will not fall asleep; if a person is woken up at the time of this phase, he may not even understand that he has fallen asleep, because the brain has not yet fully immersed into deep sleep
and at this moment there are such interesting reactions:
the brain seems to be checking: are you alive? After all, your pulse slows down, your breathing begins to calm down, and it sends signals to the muscles, asking if you are alive? Hence all these jerkings we do in our sleep
these are all the signs of this first phase, therefore, in order to go through this phase normally, it is necessary that there are no irritants in the room, the room is darkened, the TV is not working, the clock is not ticking, the street lights are not shining
the absence of light is the main factor for this phase, because melatonin, as I said, is not produced in the light - and you will not fall asleep
this is why sleep masks , especially if it is not possible to completely darken the room, then you can trick the brain in this way
Second phase of sleep
How is it different from the first one?
During this period of time, metabolic processes in the body become slower, body temperature drops, it can drop even by one degree, so you need to be careful about what the temperature is in your room, because otherwise you will not achieve comfortable sleep
And therefore it is believed that the optimal temperature in the room can be from 18 to 22 degrees. Above this temperature will not be comfortable for good healthy sleep, respectively, the temperature below this
We can say that this is a phase of sleep - low body temperature, all processes in the body slow down. If you have not reduced the temperature in the room to 18-22 degrees, then you can wake up in this phase. This phase is slightly longer in duration than the first phase and lasts about 20 -30 minutes
Third stage of sleep
It also lasts about 20-30 minutes, and is characterized by the fact that in this phase the body begins to prepare for awakening, a hormone called Cortisol is produced, this is a stress hormone
The body mobilizes to wake up and therefore at this moment, blood pressure, sugar levels in the body increase
It is at this moment that strokes and heart attacks very often occur. Therefore, doctors recommend drinking a glass of water at night to thin the blood in the body and also monitor your blood pressure, if you are taking pills for high blood pressure, then they should monitor this process at night
The end of phase 3 is the release of hormones and increased blood pressure. These cycles and we know that this is dangerous
Pattern
Here I am giving you some sleep mask patterns. Here they are:
What we need:
- Fabric for the mask - about 25 -30 cm wide and 50-60 cm long - this is for the outer and inner layers of the mask, do not forget that it should be a natural material - breathable and preferably hypoallergenic, since it comes into contact with the skin of the face
- Fabric for mask filler - it’s better if it’s natural too
- Non-woven fabric - 25 cm by 20 cm in size, so that the mask is more rigid and holds its shape
- Elastic band - about 30 cm - 2 cm wide (then adjust as much as needed for you)
- Scissors
- Sewing machine
Let's get started:
Using the pattern, we cut out two pieces for the outer and inner layers of the mask and two filler pieces - you can take cotton knitwear, for example
Then you need to cut a rectangle out of fabric - preferably thin - this will be our “case for an elastic band” and so that it is not very thick, you need to take a thin fabric, maybe chiffon, dimensions in the photo:
For children's
A children's sleep mask is sewn in the same way as an adult one, the only difference is in size
Look - these are the patterns for children's masks:
If you use your imagination, you can decorate a children's mask like this, and your child will love it like his favorite toy, and the styling process will only bring you pleasure
Instructions for classic
To make a comfortable blindfold for sleeping with your own hands, you need to prepare:
- a piece of fabric you like;
- padding polyester, felt or other light-proof material;
- wide elastic band (length – 30-40 cm, height – not less than 1.5 cm);
- threads;
- needle;
- pins;
- sewing machine;
- pattern.
Sometimes fillers in the form of medicinal herbs are used.
Before sewing a sleep mask with your own hands, take a pattern and prepared fabric:
- Two identical parts made of fabric - internal and external. Trace the template, leave allowances of 0.5 cm for the seams. Draw a new (larger) contour with the condition of these allowances - cut out the element along it.
- One piece is made of padding polyester. They also trace the template, leave 0.5 cm for allowances, draw a larger outline and cut out along it.
- Part for elastic band made of fabric. Cut a rectangular piece of approximately 55x5 cm.
Next, the gum is processed:
- The elastic flap is folded exactly in half with the wrong side facing out.
- Sew on a machine, departing from the edge 0.5 mm.
- Using a pin, turn it right side out.
- Pass the elastic band through the resulting “case”.
All that remains is to put all the elements together. Step-by-step instruction:
- An elastic band is attached to the front part of the fabric part with pins: one edge to the right side, the second edge to the left. The “tails” should extend 1 cm beyond the edges - they will be stitched and then end up inside the mask.
- The “face” of the second fabric part is placed next to the first, on an elastic band. A padding polyester is placed on top. The parts are aligned and secured with pins.
- Using a sewing machine, stepping back 0.5 cm from the edge (along the contour of the pattern), stitch the parts. Be sure to leave a hole through which the product is then turned inside out.
- In the area of the nose, small cuts along the edges are made with scissors, without touching the seam, so that the fabric does not tighten when turned out.
- Remove the needles and use a hook or tightly closed scissors to turn the mask outward.
- A properly sewn product has a front side on both sides. The edges of the elastic are hidden inside and stitched.
- Using a “hidden” seam, the hole through which the mask was turned out is carefully sewn up by hand.
Finally, all that remains is to wash the product (preferably by hand) and iron it on both sides.
Master class: how to make a dream mask with your own hands
Healthy and restful sleep is not only the key to your beautiful appearance and good health in the morning. It also helps improve immunity, protecting against various diseases of the nervous system.
Such sleep is possible only if certain factors are met: a suitable time for sleep, comfortable clothes and a mattress, comfortable air temperature, and complete darkness. If everything on the list is clear to us and can be easily implemented, then the last point raises questions. After all, it is not always possible to achieve complete darkness with curtains.
In this case, there is a dream mask. It’s very easy to make it with your own hands, so we suggest you study a master class on creating a useful accessory.
What is the best material to use?
A DIY dream mask is made from fabric and elastic. Lace, rhinestones, fleece appliqués, and so on can be used as decoration. The tools we will need are a needle and thread and scissors.
The sleep blindfold consists of three parts: the main part, the seal and the lining. For the main (top) part, satin or silk is usually used. This fabric is pleasant to the touch and looks beautiful. You can also use other synthetic and natural materials (for example, linen or cotton).
Non-woven fabric is used as a sealant. It is soft and quite dense - this is what is necessary for a night accessory. Thanks to this layer, a self-made dream mask will not put pressure on the eyes and at the same time will keep its shape, and light will not pass through it.
The lining is the part that is applied to the face. That is why to create it they use the most pleasant material for the body - flannel or fleece. This fabric does not cause irritation.
Basics of Sewing a Night Sash
Before you begin any sewing, you need to make a pattern. Our case is no exception. The main task of a night accessory is to make our rest comfortable. Therefore, the pattern of a sleep mask must correspond to the anatomical features of the face.
The standard mask size is 190 x 95 mm. It has an oval shape with a recess for the nose. This is the most common type of mask. There are also those that consist, for example, of two triangles.
You can print out an example of a pattern or draw it yourself using the photo above. It’s better to do it right away on thick paper to make it easier to work with.
Let's start sewing
The master class (how to make a sleep mask) consists of the following steps:
- Prepare a paper pattern, tools and necessary materials (for example, silk, interlining and flannel).
- Attach the pattern to the flannel, pin it with needles and pins and trace it along the outline. Cut out one piece.
- Make two more similar parts from silk and non-woven fabric.
- Now fold the mask: flannel is placed face down, non-woven fabric, silk - face up. Connect the layers using pins.
- Cut off a piece of elastic. It should not be too long so that the blindfold does not fall off while sleeping, and not short so that nothing presses on it.
- Cut a rectangle from the same material as the top of the mask. The length should be equal to the size of the elastic band, and the width should be two to three times larger.
- Sew the rectangle lengthwise, leaving the edges undarned.
- Then make two parallel lines in the middle so that the strip is divided into three parts in length. Moreover, an elastic band should fit into the middle one.
- Insert the elastic into the prepared piece and secure its ends with pins.
- Attach the elastic band around the edges to the mask. You need to insert it between the top and middle layers.
- Sew all the parts together, leaving a small hole through which you can turn the mask out.
- Make notches along the unstitched edges. To do this, use scissors to make frequent small cuts. This is necessary so that the fabric is evenly distributed and does not gather in an accordion.
- Turn the product inside out.
Main part
After all the details of the sleep bandage have been cut out, they begin to decorate its front part. For this purpose it is allowed to use:
- guipure;
- beads;
- beads;
- lace;
- thermal stickers;
- eye images.
When the front side has acquired the desired appearance, it is sewn to the inside of the mask. These actions can be performed either manually or using a sewing machine.
When using the first option, the stitches are made small, neat, similar to a machine seam.
A pair of main parts are connected to each other, but only on three of the four sides. After this, small cuts are made in the seam allowances, the resulting workpiece is turned inside out and filled with padding polyester or foam rubber. The thickness of the product ultimately varies between 1-1.5 centimeters. To complete the work with the main part, the remaining unstitched parts are stitched.
We sew an elastic band
When making a blindfold for sleeping with your own hands, it is extremely important to take a responsible approach to sewing the elastic. The same fabric is used as for the outer part of the accessory. A rectangle is cut out of it, 30-40 centimeters long and only 3-5 centimeters wide.
The resulting part is folded in half lengthwise with the front side inward. Making an indentation of three millimeters, stitch along the entire length. After this, the finished belt is turned inside out. Using a pin, an elastic band is threaded into it.
The fabric should gather a little. When the bandage is put on, the belt will straighten and take on a neat appearance.
The elastic band is secured to the fabric on both sides using several stitches. This part is then sewn to the finished mask. Perform these steps using a sewing machine. It is noted that if manually stitched, the accessory will be fragile and short-lived.
Manufacturing recommendations
When sewing a mask you need 2-3 layers of material:
front side. This layer is required. You can take any fabric you like. Silk, cotton, satin can be used. The material is taken in one color or decorated with various prints; lining. This layer is optional. Thanks to its presence, the accessory becomes softer and retains its desired shape. If desired, no filler is used. As a rule, padding polyester is placed inside the product. A good solution would also be fleece or non-woven fabric. However, it should be taken into account that the materials are warm, and when wearing a mask, the face may sweat, which is extremely undesirable; inner part. Also refers to mandatory parts. This tissue will be in direct contact with the skin
Therefore, special attention is paid to its choice. Preference is given to soft, natural materials (chintz, satin, flannel or cotton)
The use of synthetic fabrics is strongly discouraged - they can lead to the development of an allergic reaction. There can be no talk of any comfortable sleep.
Figuring out how to sew a blindfold is easy. The main thing is to accurately determine the size. As a rule, the main part varies in width from 18-20 centimeters, and in height - from 7 to 10 centimeters. The slot for the nose is made approximately one third of the height.
The bandages should initially be cut out from paper, after which the resulting pattern should be applied to the face. In this way, it is possible to select the most suitable parameters.
The length of the elastic is a purely individual parameter. Here you should also do a fitting. This part of the accessory should fit snugly, but not cause discomfort.
Using one pattern it will be possible to make various masks. To do this you just need to show a little imagination. They are decorated with:
- applications;
- lace;
- rhinestones;
- sequins;
- embroidery
The list of materials that can be used as decoration is not limited to this. It is not worth adhering to a strictly defined technology for making a bandage. The product must be unique, inimitable.
“Girly” with decor in the form of closed eyes
It looks very beautiful, but making such a mask with your own hands is not at all difficult. Prepare for work:
- fabric (in the example pink satin is used);
- embroidery thread for decoration (optional);
- guipure for ruffles;
- pattern;
- elastic band;
- soft dense fabric for the “core” (wool is used in the example).
What you will need to sew a mask
Step 1 . Start working with a pattern. Take an A4 sheet of paper, fold it in half and draw half of the future headband. The sides must be symmetrical. Approximate dimensions are shown in the picture below.
Sleep mask pattern
Step 2 . Cut out the necessary parts: 2 from the main fabric, making an allowance of 10 mm, 1 from the lining (no allowance is needed), guipure, the length of which should be twice the perimeter of the mask, and a strip of fabric (approximately 3x40 cm).
The necessary details are cut out
Step 3 . To create a ruffle, collect the guipure into such an “accordion”.
Guipure needs to be collected into an “accordion”
Step 4 . Sew the guipure to the “core” of the future product.
The ruffle is sewn to the mask
Step 5 . You can start decorating the front part. In our example, a pair of closed eyes is embroidered.
Decorating the front part of the mask
Step 6 . Then sew a strip of 3x40 cm, pull the elastic inside.
The rubber band needs to be pulled in
Step 7 . Assemble all the parts into a single whole, sew a blindfold around the perimeter.
“Girly” sleep mask with decor in the form of closed eyes
On a note! If you don’t have a sewing machine, you can easily get by with hand stitching. Additionally, you can decorate the mask with patterns, ears, a bow...
How to sew a sleeping pillow with your own hands
A hand-sewn pillow will meet all the quality standards of a housewife and will save money on purchasing store-bought analogues. After preparing the appropriate filler and accessories in the form of needles, threads and fabric for the bedspread, you can begin to work. First, you need to determine the size of the future product. Standardly it is 70 by 70 cm, and according to the European standard - 70 by 50. If you deviate from these standards, you will also have to sew a pillowcase yourself.
The process of sewing a decorative pillow in the shape of a flower
The step-by-step sewing instructions are as follows:
- The canvas is laid out on a flat table or on the floor. The fabric is measured. For example, if the future pillow is 50 by 50 cm, then you should measure 50 by 100 cm. Draw marks and lines with chalk, add 2 cm allowances to them on each side. The result will be a cut of 54 by 103 cm;
- Fold the rectangle in half and iron. Pin future seams with sewing pins and baste;
- Sew along the lines marked earlier for the seams. Previously, this was done by hand, but now machines are used;
Decorative item from an old sweater
- Sew the corners, making small roundings. Leave 10 centimeters of unsharpened space on one side. Overcast the napkin and secure the seams by cutting the threads;
- Turn the base inside out and straighten all the corners, ironing them;
- Fill the product with the selected filler through the gap left without a seam;
- Sew the seam in any way, making it hidden. Beat the product with your hands.
Breastfeeding pad pattern template
With tiger print
To make the mask truly original, choose an interesting fabric or do embroidery/painting. To make such a cute headband, prepare:
- fabric for the internal and external parts (we talked about the requirements for materials above);
- black thick fabric for lining;
- padding polyester;
- tailor's scissors;
- elastic band (wide);
- pencil, paper for template;
- bias tape or braid to finish the edges;
- tailor's scissors;
- threads;
- sewing machine
What you need to make a mask
Step 1 . Traditionally, you should start by creating a template. For example, you can use this one. The pattern needs to be drawn on paper and cut out.
Sleep mask pattern
Step 2 . Cut out 1 piece from each fabric. The result will be 3 identical parts.
You should get 3 identical parts
Step 3 . Cut out 2 more similar parts from padding polyester.
Parts are cut out from padding polyester
Step 4 . After this, fold the resulting parts in the following order: inner part (wrong side up), padding polyester, black fabric, padding polyester, facing fabric.
All parts are folded
Step 5 . Sew all the parts together, leaving about 3 mm from the edge.
Step back 3 mm from the edge
Step 6 . Finish the edges of the product with bias tape or braid.
Processing the edges of the mask
The edges of the mask are processed
Another photo of the result
Step 7 . Now all that remains is to sew on the elastic band. That's it, your homemade sleep mask is ready!
At the end you need to sew on an elastic band
Features of a sleep mask
A good product should have the following characteristics:
- Opacity. Therefore, you need to use thick fabric or material folded in several layers.
- Softness and elasticity. The product should not create discomfort during rest. It should be as soft and comfortable as possible when sleeping.
- Convenient shape. A high-quality pattern is the key to a good product. Making a pattern requires a lot of trial and error. Therefore, if the first mask turned out to be not very comfortable, it can be adjusted or used to make a second, already improved product.
- Hypoallergenic. You should only use soft fabrics that do not irritate the skin. Preference should be given to natural materials.